LDRs are used as the main light
sensors. Two servo motors are fixed to the structure that holds the
solar panel. The program for Arduino is uploaded to the microcontroller.
The working of the project is as follows.
LDRs sense the amount of sunlight falling on them. Four LDRs are divided into top, bottom, left and right.
For east – west tracking, the analog
values from two top LDRs and two bottom LDRs are compared and if the top
set of LDRs receive more light, the vertical servo will move in that
direction.
If the bottom LDRs receive more light, the servo moves in that direction.
For angular deflection of the solar
panel, the analog values from two left LDRs and two right LDRs are
compared. If the left set of LDRs receive more light than the right set,
the horizontal servo will move in that direction.
If the right set of LDRs receive more light, the servo moves in that direction.
Setup
Step-1
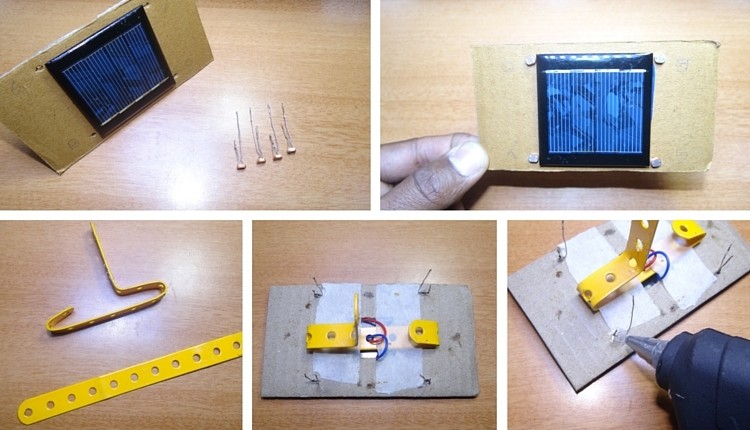
Take cardboard. Make a hole in the middle and four holes on four sides so that LDR fit into that.
Stick the solar panel to the cardboard and bring two wires of the panel out as shown.
Step 2
Now cut one of the two leads of the LDR so that one lead is shorter and other is longer.
Insert these four LDRs into four holes as shown.
Bend the straight Perforated metal strip as shown below.
Place the bent metal strip on the back side of the cardboard
Apply glue to the LDR to fix them firmly.
Step 3
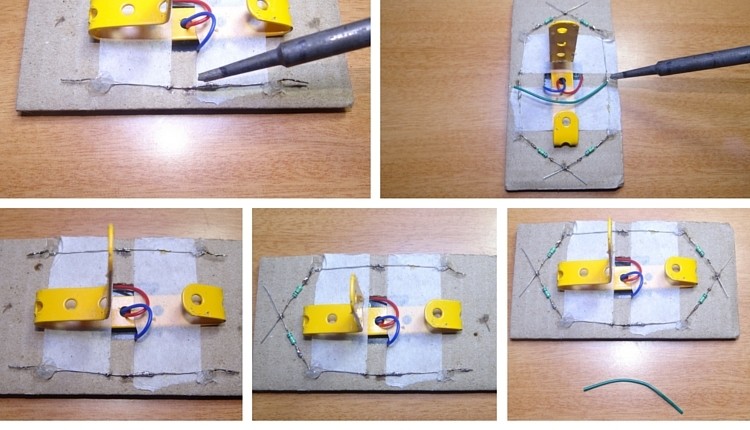
Solder the two leads of LDR as shown
To the other ends of LDR Solder resistors of 10k ohm
Join the four leads of the 4 LDRs by connecting with a wire.
Step4
Now take a bus wire.This is used to connect the Outputs of four LDRs to Arduino board.
Insert it into metal strip as shown in the image.
Now Solder the four wires to four LDRs at any point between LDR and resistor.
Step 5
Insert another two wire bus into the perforated metal strip as shown.This is used for supplying Vcc and GND to LDR circuit.
Solder one wire to the leads of LDRs which are connected to resistors and other wire to the other leads.
Short the leads of LDRs connected to resistors using a wire as shown.
Step 6
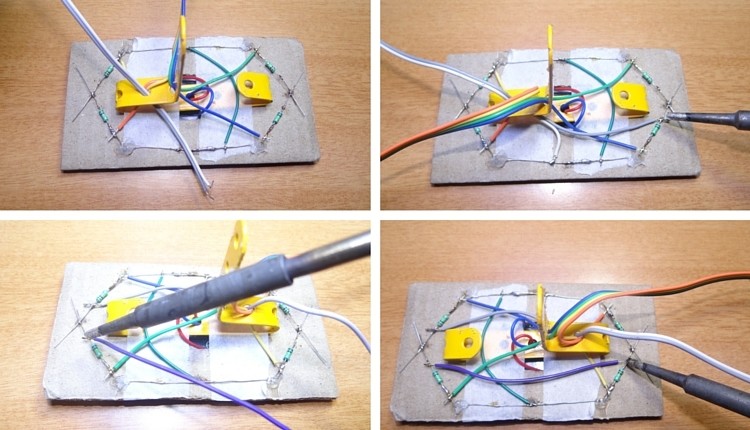
Now connect a servo motor to the Perforated metal strip using Screw.
Apply glue to the servo to fix it firmly.
Step 7
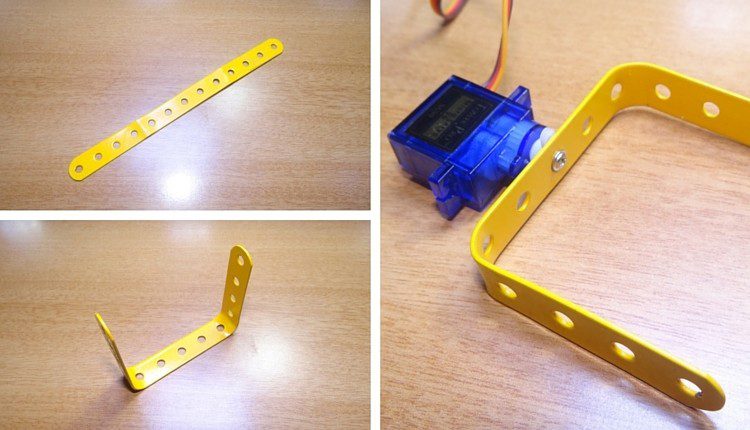
Take another straight Perforated metal strip and bend it as shown in the figure.
Step 8
Now place the set up of solar panel and first servo motor to the metal strip of second servo motor as shown.
Project Code
#include <Servo.h>
//defining Servos
Servo servohori;
int servoh = 0;
int servohLimitHigh = 160;
int servohLimitLow = 20;
Servo servoverti;
int servov = 0;
int servovLimitHigh = 160;
int servovLimitLow = 20;
//Assigning LDRs
int ldrtopl = 2; //top left LDR green
int ldrtopr = 1; //top right LDR yellow
int ldrbotl = 3; // bottom left LDR blue
int ldrbotr = 0; // bottom right LDR orange
void setup ()
{
servohori.attach(10);
servohori.write(0);
servoverti.attach(9);
servoverti.write(0);
delay(500);
}
void loop()
{
servoh = servohori.read();
servov = servoverti.read();
//capturing analog values of each LDR
int topl = analogRead(ldrtopl);
int topr = analogRead(ldrtopr);
int botl = analogRead(ldrbotl);
int botr = analogRead(ldrbotr);
// calculating average
int avgtop = (topl + topr) / 2; //average of top LDRs
int avgbot = (botl + botr) / 2; //average of bottom LDRs
int avgleft = (topl + botl) / 2; //average of left LDRs
int avgright = (topr + botr) / 2; //average of right LDRs
if (avgtop < avgbot)
{
servoverti.write(servov +1);
if (servov > servovLimitHigh)
{
servov = servovLimitHigh;
}
delay(10);
}
else if (avgbot < avgtop)
{
servoverti.write(servov -1);
if (servov < servovLimitLow)
{
servov = servovLimitLow;
}
delay(10);
}
else
{
servoverti.write(servov);
}
if (avgleft > avgright)
{
servohori.write(servoh +1);
if (servoh > servohLimitHigh)
{
servoh = servohLimitHigh;
}
delay(10);
}
else if (avgright > avgleft)
{
servohori.write(servoh -1);
if (servoh < servohLimitLow)
{
servoh = servohLimitLow;
}
delay(10);
}
else
{
servohori.write(servoh);
}
delay(50);
}
If you are the one who loves to craft inspiring projects then Arduino
solar tracker is for you. But still, if you are unable to design
projects on your own that may be due to the lack of components or some
other issues. To them, we bought the Best Solar Panel Kits for Homes that completely satisfies their requirements.
In this article, detailed information on
solar panels like prices, power usage and performance is given for the
convenience of users. Make a try with these wonderful solar panel kits
to install them in your homes.
More and more makerspaces around the world are looking to add coding and electronics to their maker education programs. One of the best ways to do this is by integrating an Arduino board into makerspace projects and lessons. We’ve found that a lot of maker educators haven’t taken the plunge into coding or Arduino because they think programming is scary. Because of this, we wanted to make sure this tutorial was written for the absolute beginner with no experience whatsoever. This tutorial is a high level view of all the parts and pieces of the Arduino ecosystem. In future posts, we will take you step by step in creating your first simple Arduino project. What Is Arduino? Arduino is an open source programmable circuit board that can be integrated into a wide variety of makerspace projects both simple and complex. This board contains a microcontroller which is able to be programmed to sense and control objects in the physi...
GSM Based Home Security Alarm System Using Arduino Home Security Systems are an important feature of modern residential and office setups. Home security systems must be affordable, reliable and effective. Modern complex home security systems include several security features like fire, intruders, electronic door lock, heat, smoke, temperature, etc. Some security systems may be a combination of all the security measures. Such complex systems may be expensive and may not be affordable by everyone. There are individual security systems based on the requirement. In this project, we designed a simple but very efficient home security that has a function of calling the homeowner on his/her mobile number in case of an intruder alert. Help us in selecting the next DIY Arduino Project. : Select your Favourite Project » The project is based on Arduino, PIR motion detection sensor and GSM Module. Table of Contents Circuit Diagram Hardware Required Circuit ...

 Step 7
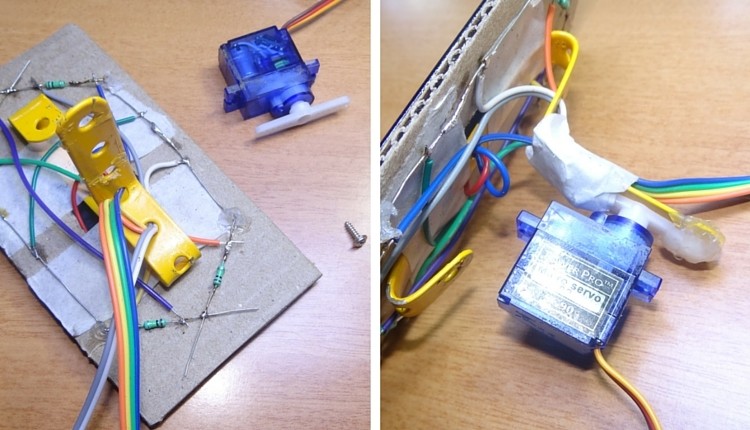 Step 8
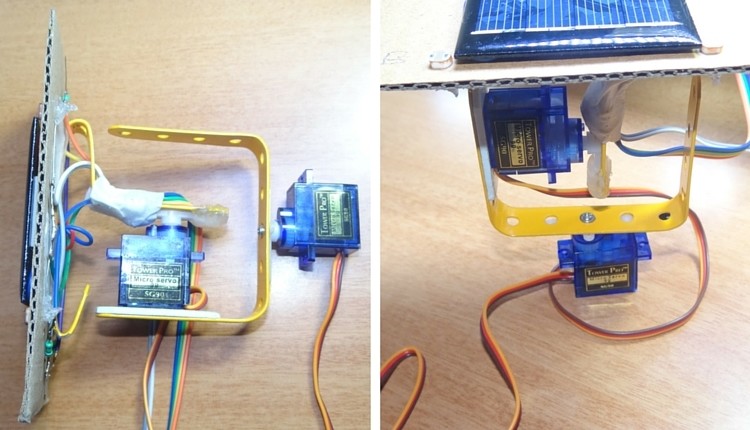


Comments
Post a Comment